Around the House

a coffee table – with seats

Last winter I started the hunt for a coffee table. I had something very specific in mind, which is never a good place to start when 1) you don’t like to spend a lot of money on furniture 2) your expectations are a little far fetched.

What I had in mind was a large square or circle storage ottoman that could double as a coffee table. I was very lucky to find several online that were the too small, the wrong color, or several hundreds of dollars out of my price range.

And then I came across a table on Craigslist.

Now a good blogpost would include pictures of the original post I found on Craigslist but in my haste to email and visit the seller, I forgot.

So just imagine, a black, 36″ square coffee table with pullout seats underneath topped with – wait for it – black pleather.

Fancy, huh?

But I knew I could paint the black table, and I thought I could try recovering the seats, so with that information we drove to look at it.

Once we met the kind seller, we did a quick review of the table and stools to check for sturdiness and overall condition. She said it was a few years old and for the most part was in perfect condition, minus one “dent” on the side.

She had it listed for $125 and I was ready to pay that much for it, but when we told her we’d have to go to the ATM to get the rest of the money, she sold it to us for what we had on us – $75!

Needless to say I was thrilled with our purchase and couldn’t wait to get it home and reassembled.

Once we got it in, I did a quick picture of it compared to our old coffee table, which now looked like a dwarf compared to our new square table.

 A few days later after building up the mental courage to begin painting, I went to Lowe’s for supplies: paint, paintbrush, and a small, disposable roller. I decided to use my go to chalk paint recipe because the idea of sanding all the table and stools sounded and still sounds like a nightmare.


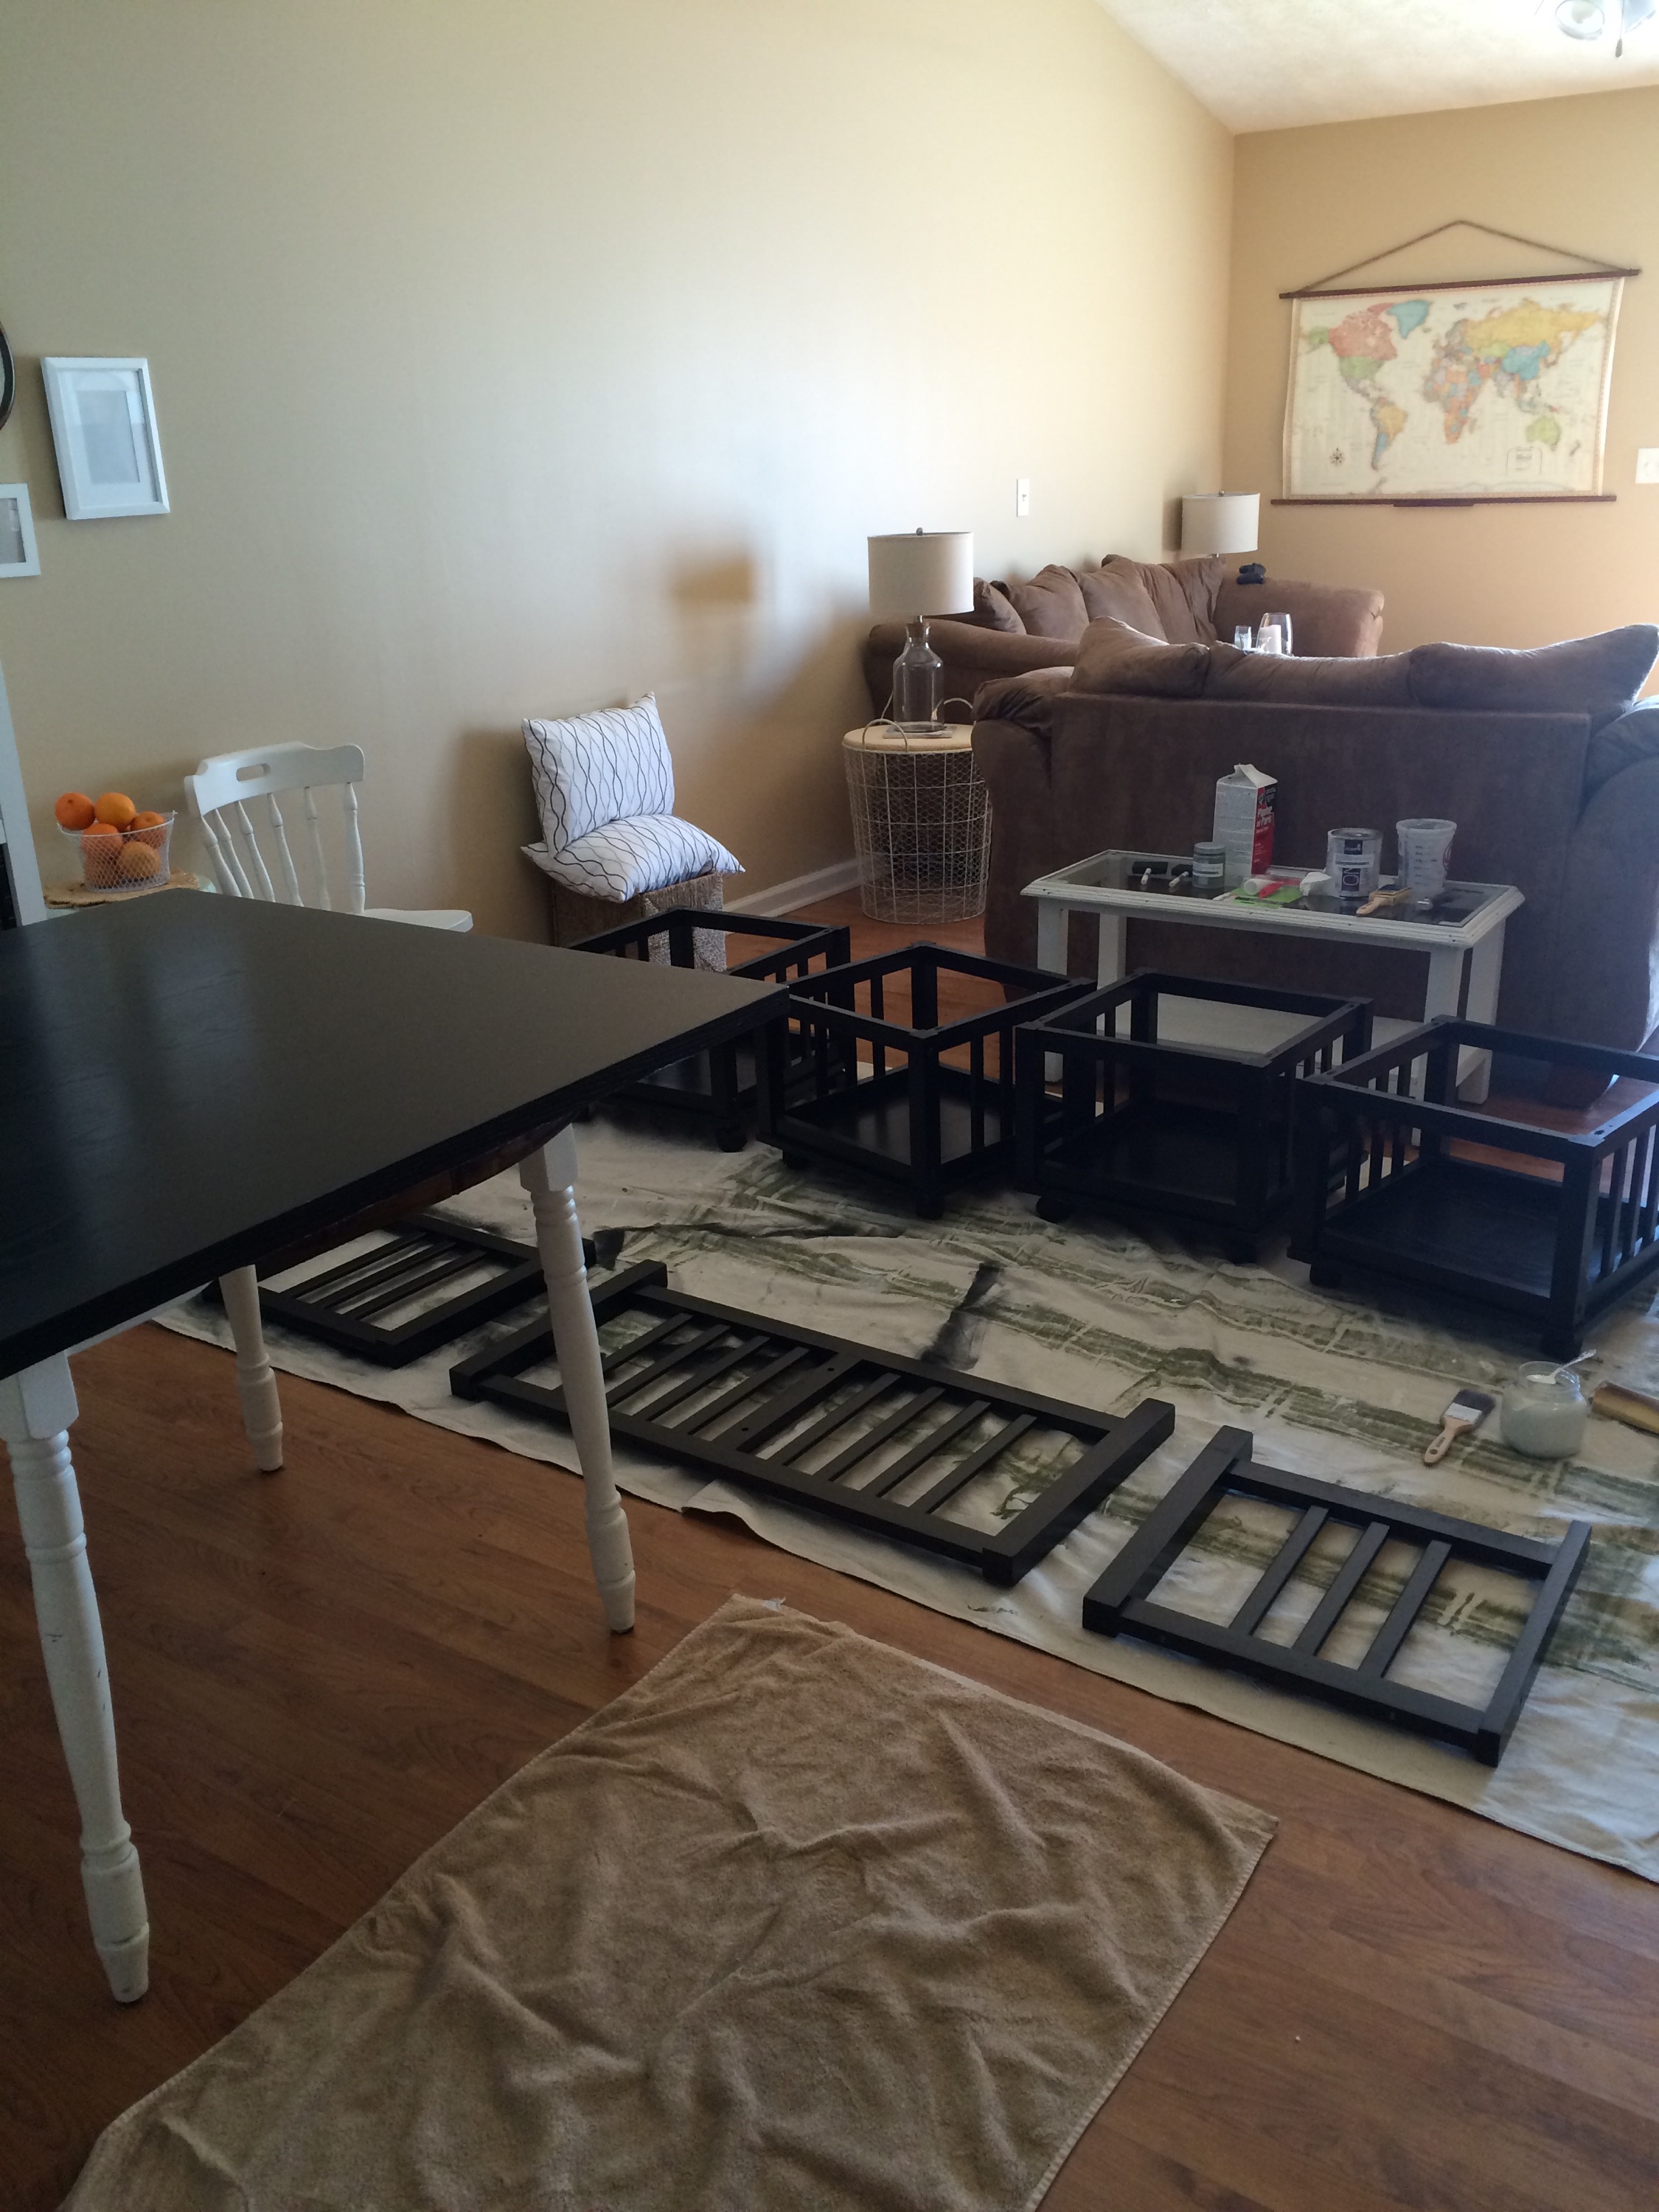
After about two full coats we were in action. It’s always so fun to see the second coat drying – mostly because that means you’re almost done, you get to reassemble, and remove the dropcloths from your living room floor 🙂

The next item on my to do list was one I hadn’t tried yet – reupholstering.

I use that term VERY loosely because this was about the most basic reupholstery job you can find {read – I didn’t even remove the pleather, I just decide to cover right over it!}. #LazyDIY-er 
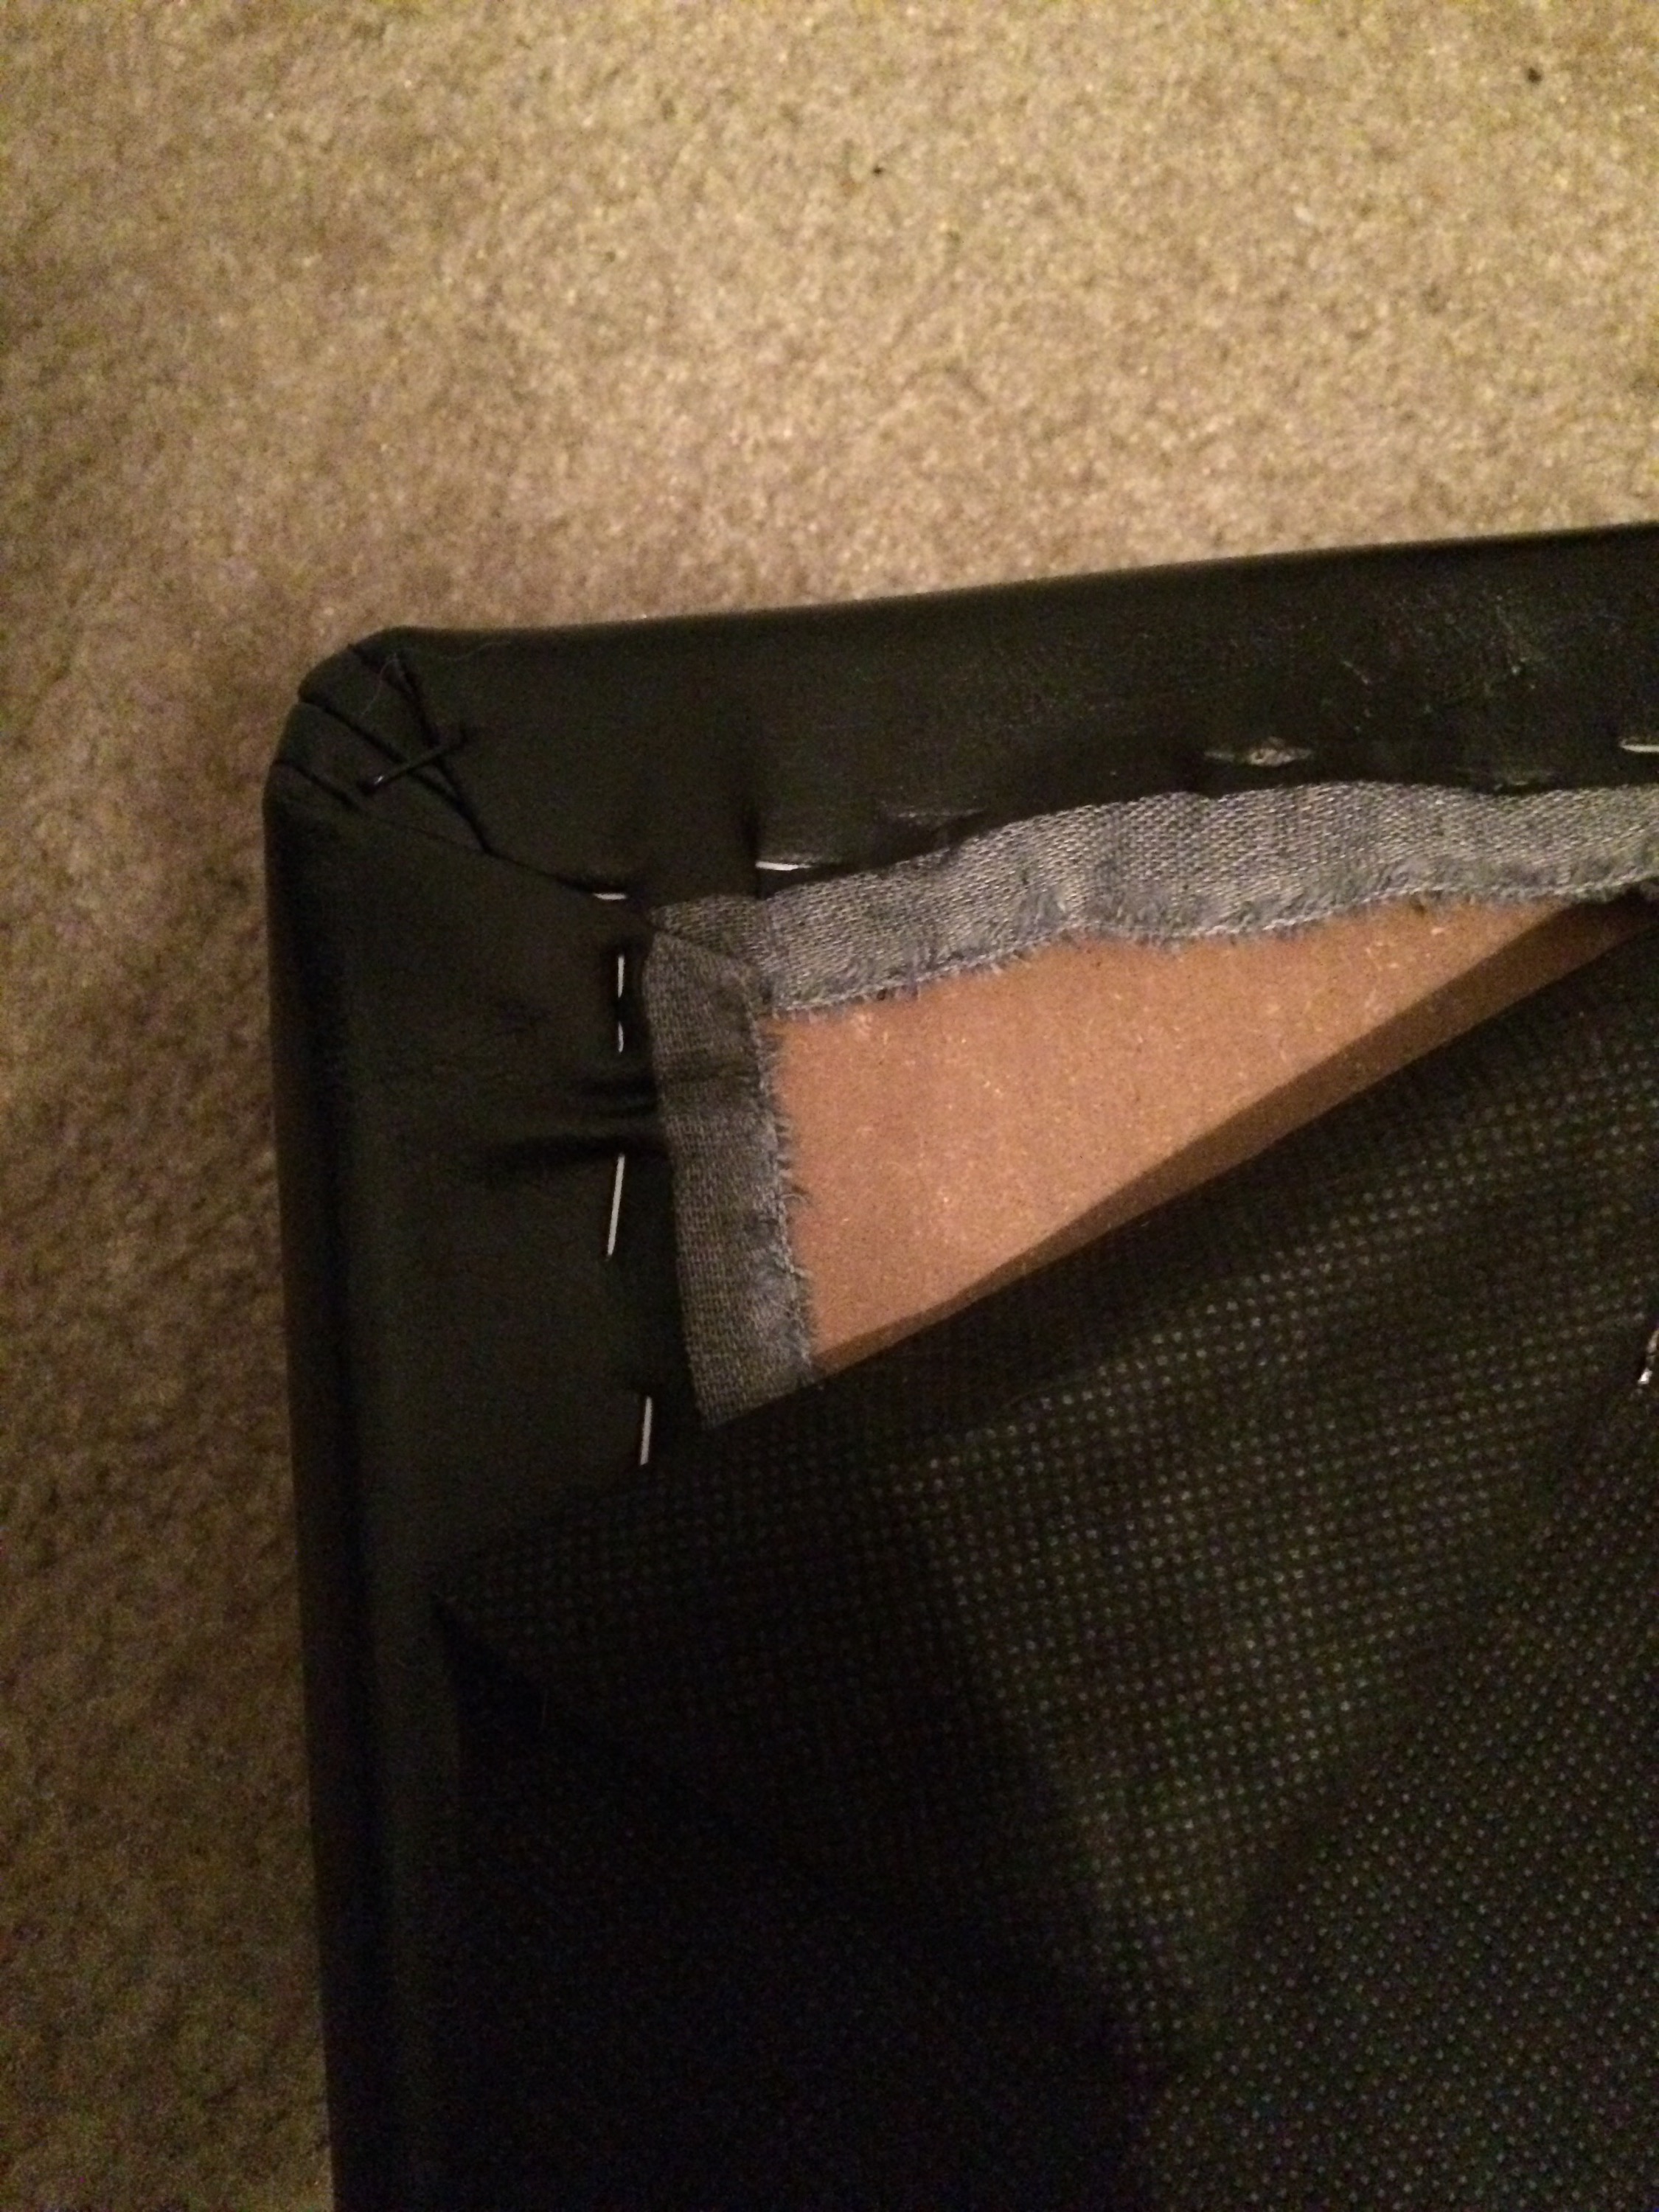
One of the more fun parts of the whole project was looking at fabrics. After looking through the store, I decided I wanted something simple versus a bold pattern, and was set on ticking stripes. I texted G this picture – hoping he would confirm the one I was leaning towards.  

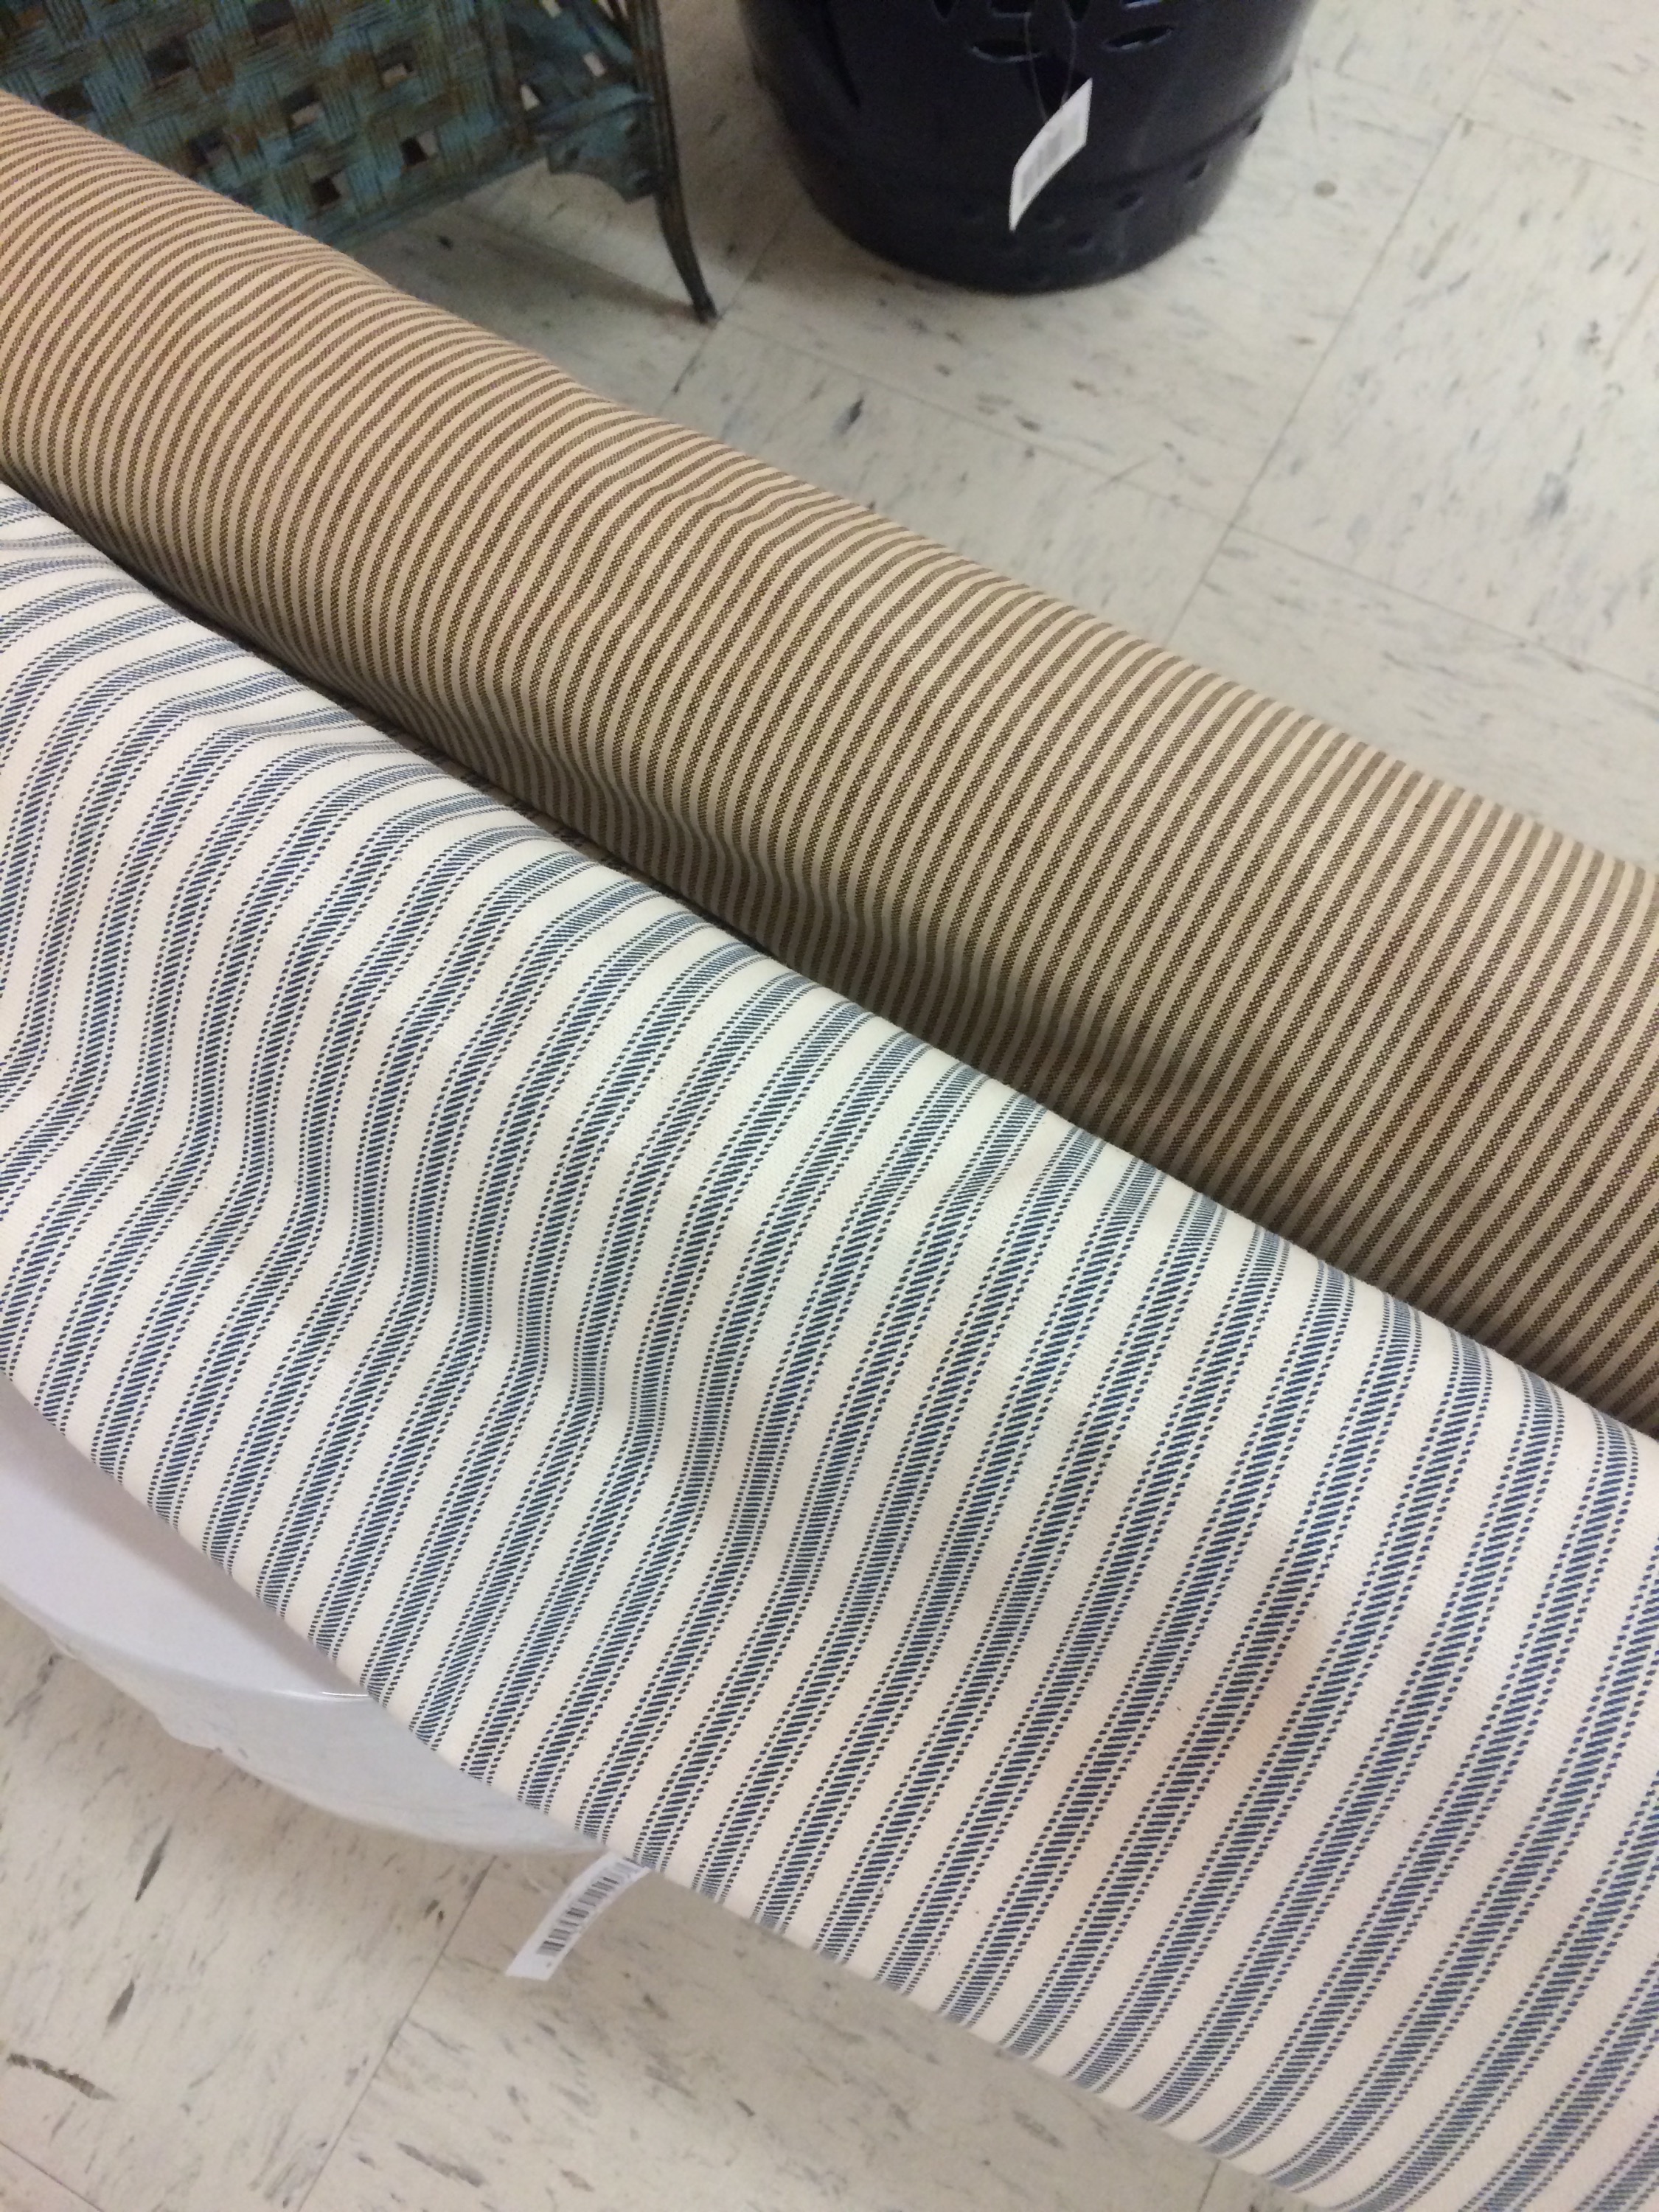
And he did! The blue and cream ticking stripe won! 
G thought the other was little dingy and I agreed. So with my coupon I headed to the counter and checked out for a little less than $15.

When I got home, I watched a few tutorials on YouTube on how to recover, and got the gist down. The only thing I had trouble with (other than my hand being sore from 100+ staples) was the corners, and I eventually figured out a way to make them uniform.
 
We’ve had our table for several months now and really enjoy it!
Eventually I’d like to find some baskets to place underneath for concealed storage, but there going to have to be a specific size so I’m not in a rush.  Speaking of baskets, the one on our table was a wedding gift. I’ve loved it since the day we got it but couldn’t ever use it anywhere because of its size. And trust me, I even tried hanging it on the wall. 🙂 I was thrilled to be able to finally use it and I love that it gives the table a more finished look!

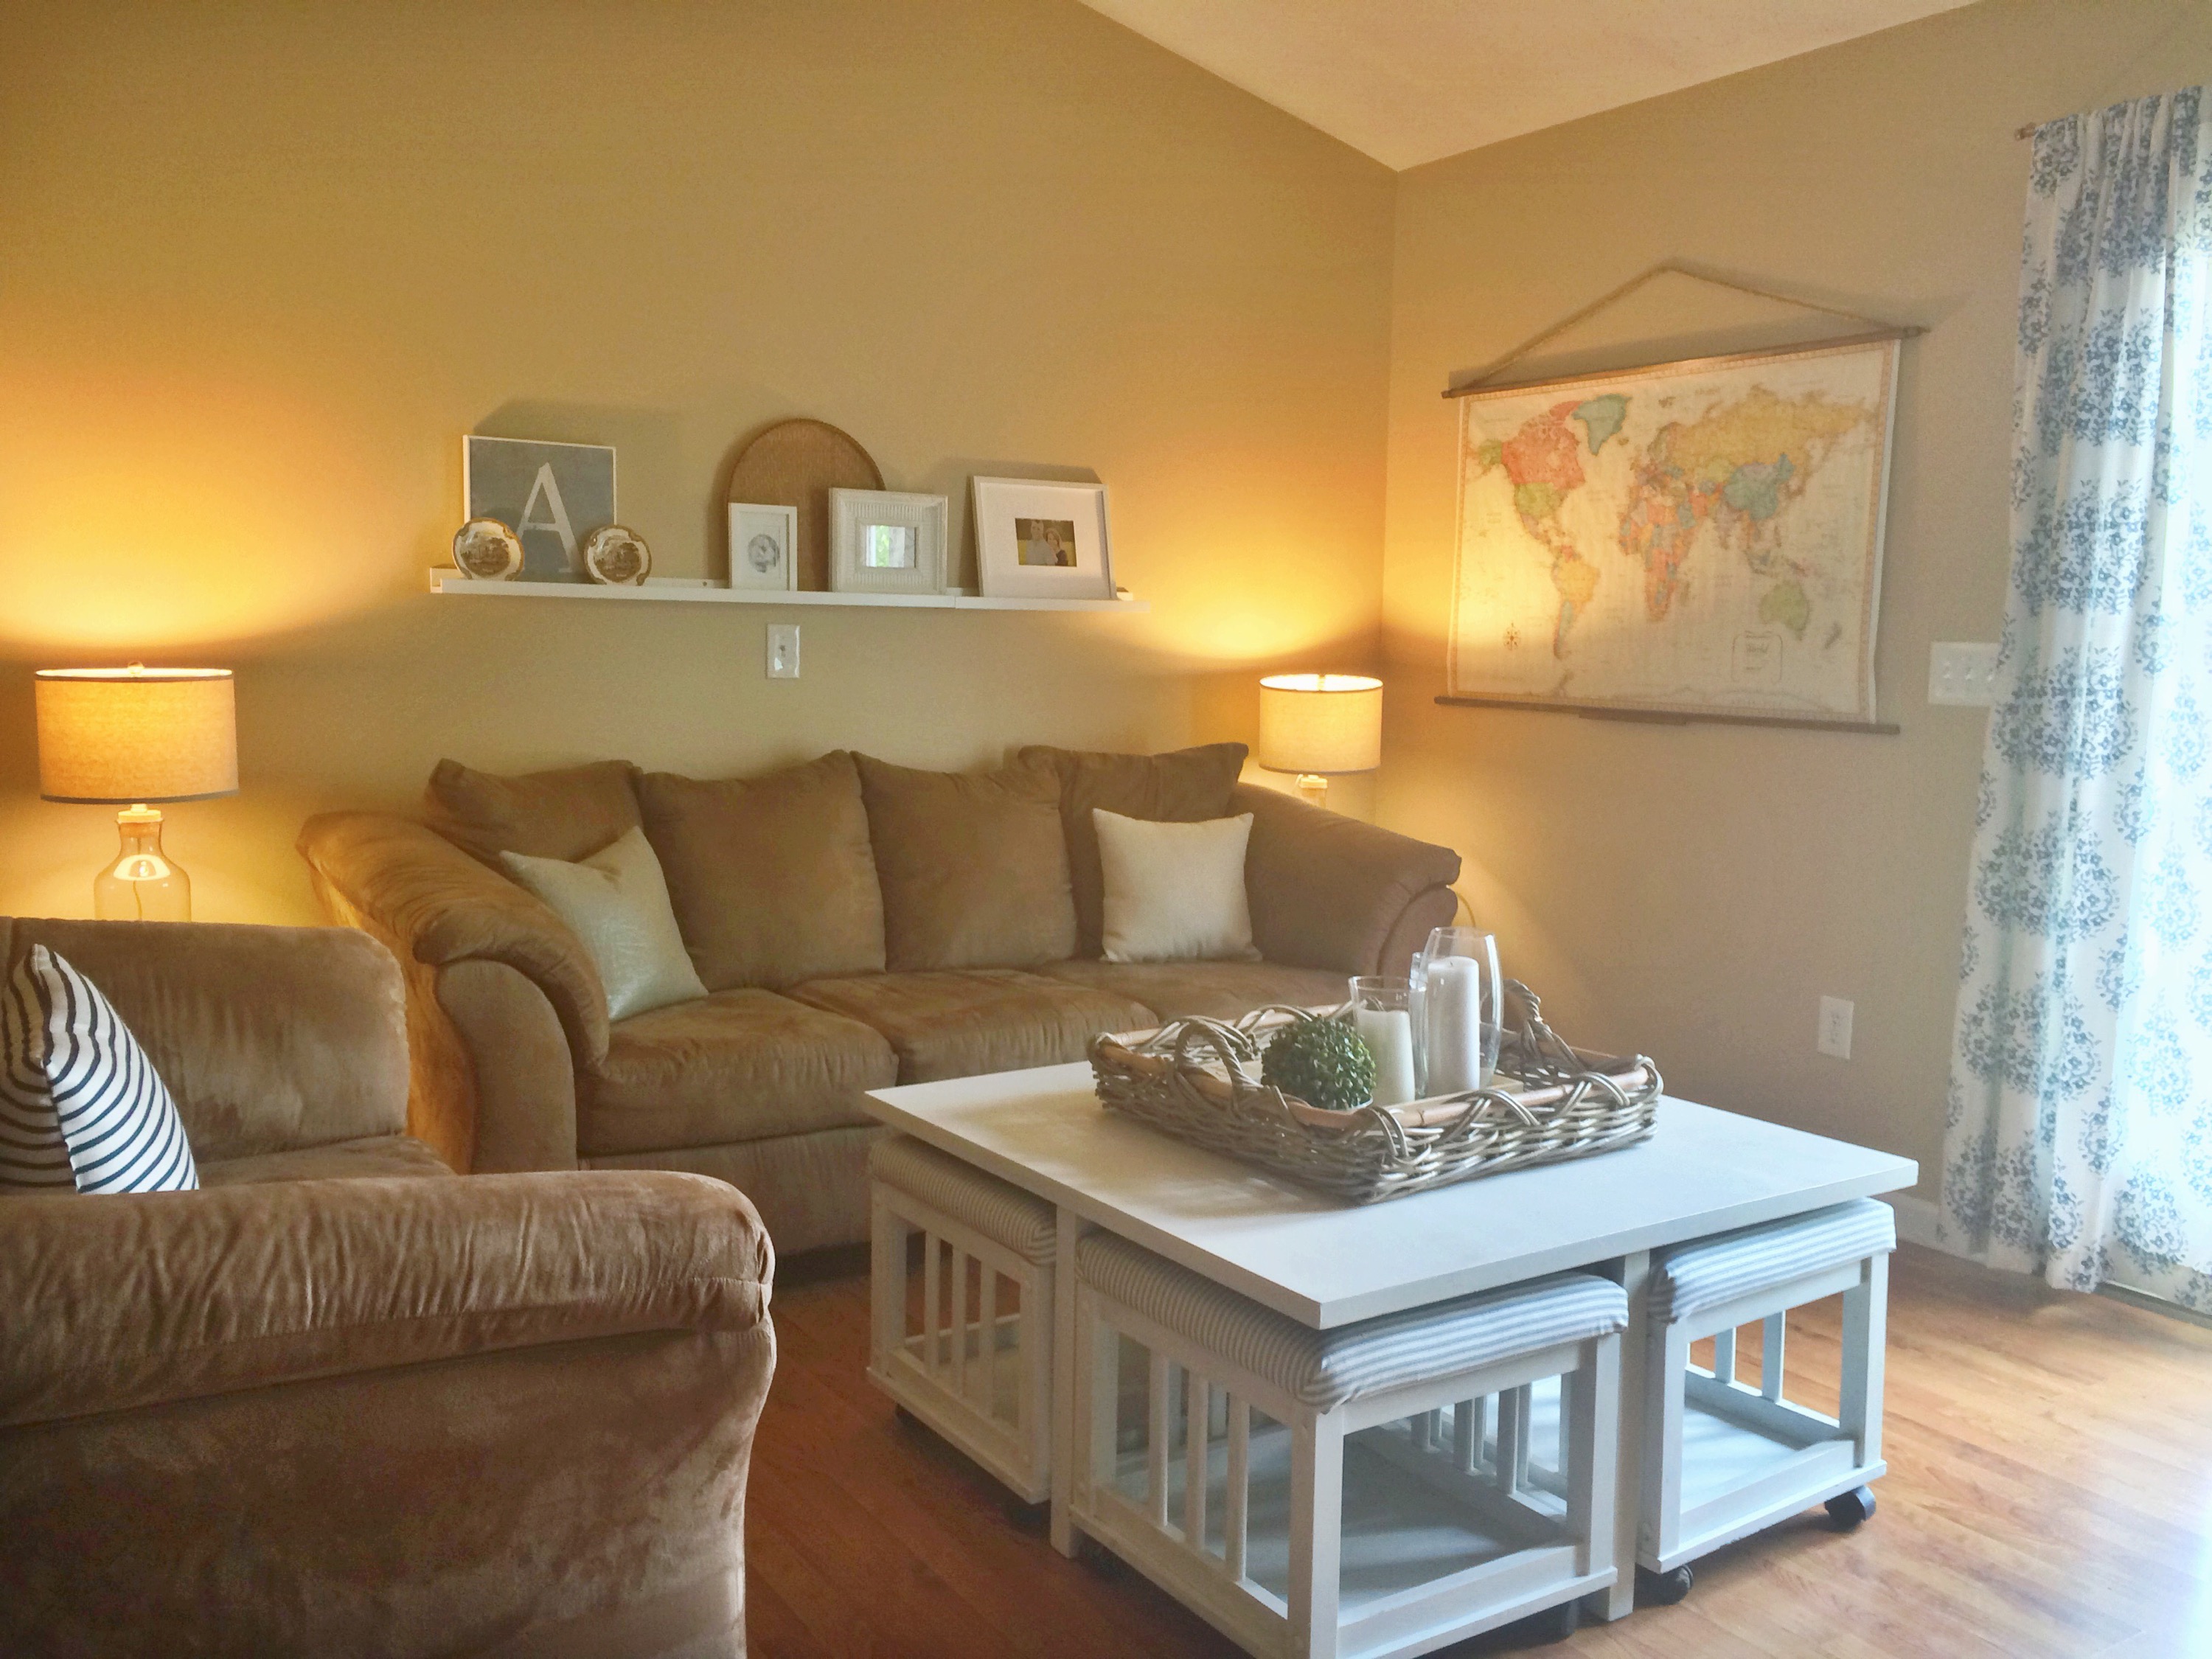
Have you ever bought something off Craigslist? This has been my favorite find to date!

Around the House

magazine holder update

When I went to Staples to pick up supplies for my organized dvd storage project, I also picked up a few magazine holders. I had a few large yearbooks that I wanted to get out of a drawer and onto a bookshelf, but also didn’t want to look at them all the time.

I never realized how pricey decorative magazine holders were until I started looking at them, so I decided just to pick up the cheapest ones I could find and update them.

What I found at Staples is what you see below – a black, gray and white speckled cardboard rack that matched nothing. So G and I made a stop to Michael’s and visited the scrapbook paper aisle {#AtwellAdventures for me, not so much for G 😉 }.  I found a simple geometric honeycomb pattern in mint and royal and picked up two sheets of each – one for each magazine rack I had.

Once I got home I laid out all four of my supplies: magazine holder, scrapbook paper, glue tape pen, and adhesive bookplate.

Magazine Holder DIY Update 2 | Atwell Adventures


After a few swipes of tape, I wrapped the faces and part of the sides of the magazine holder.  The final touch was adhesive bookplate.  Easy peasy!

Magazine Holder DIY Update | Atwell Adventures


The scrapbook paper doesn’t completely cover the sides, but once things are on the shelf, you don’t notice.

If you wanted to display them outside of a shelf, you could always paint them, use wrapping paper, or even a couple of sheets of scrapbook paper would do the trick.  I love that this project was an easy, inexpensive update and can be changed if I ever find something else I like more.

Magazine Holder DIY Update 3 | Atwell Adventures
Now excuse me while I go print some labels that fit! 🙂

Around the House

dumpster dresser no more

So remember back in early 2014 {I can say that now that 1/6 of the year has gone by, right?} when I told you I went on a dumpster shopping adventure?

Well things are finally looking brighter.dumpster dresser to console | Atwell Adventures.011

Especially considering that they started like this.

dumpster dresser to console | Atwell Adventures.001

So let’s go back to New Years Eve.  I drove to our community dumpster and there was a dresser, sitting all alone in the cold.

I thought to myself, I should take this, but honestly didn’t know what I would do with it. Afterall, it was missing all the drawers.

So I left it.  Then when I found myself still thinking about it twenty-four hours later, I decided I would stop on the way home from getting groceries and see if it was still there.

It was. And now that it was beginning to rain, I decided I didn’t have time to wait for G to help me come back and load it.  This was coming home with me right then.  

So after some awkward maneuvering, I managed to get it in the back of my car {yay for SUV’s!}.

dumpster dresser to console | Atwell Adventures.002

And then I cleaned it as much as possible and moved it to its new home… a big blank wall in our living room that was wanting some furniture in front of it.

dumpster dresser to console | Atwell Adventures.003

When I picked it up on that rainy day, I knew I wouldn’t use it as a dresser, but rather as a bookcase or console.  I gave myself a few days to think about how best to go about getting it there and then I went to work.

First thing I did was to remove the drawer tracks.

dumpster dresser to console | Atwell Adventures.004 copy

With two screws each track, it only took about 10 minutes to remove all of them and already I saw improvement.

dumpster dresser to console | Atwell Adventures.004

Later that night I sent a text to one of my brother-in-laws who has recently built some tables and benches.  I asked him about different types of wood, plywood, and mdf and asked what he recommended to use for shelves and the next morning I was off to Lowe’s.

dumpster dresser to console | Atwell Adventures.005

I picked up some plywood for the shelves, and one of the small test pots of paint which I had color matched to Benjamin Moore’s Dragonfly.  I wanted the back of the case to be a different color {like seen on Young House Love} and the rest of the piece would be Olympic Country Beige, which I already had on hand from previous painting projects.

dumpster dresser to console | Atwell Adventures.006

dumpster dresser to console | Atwell Adventures.007

Once I finished all the painting, I realized because of the depth of the piece, you don’t really notice the back is a different color.  Still glad I tried it though.

The next step was to position all the shelves.  Now here’s where I tried to save a few dollars.

The measurements for the shelves to be flush on both sides were 26”.  The plywood I found at Lowe’s only came in 48” so in order to save, I had it cut down to two 24” boards.  I knew I was going to use trim to cover up the differences so I thought it would work.

dumpster dresser to console | Atwell Adventures.008

While you can still see the gaps on the sides at certain angles, I was overall pleased with how well the trim helped to conceal everything.  For the trim, I chose various widths to give it some dimension and then used liquid nails to secure the trim in place.  Once the liquid nails was set for a few minutes, I went back over with painters tape to hold it in place so it could dry.

dumpster dresser to console | Atwell Adventures.009

When all was finished drying, I peeled the tape off and started loading things on.  We still have a long way to go – and a gallery wall to arrange overhead but my dumpster piece, you’ve come along way.

dumpster dresser to console | Atwell Adventures.010